Can you imagine Snapchat without any filters and lenses? Let’s say you go to sleep at night, and the next morning, you open Snapchat to send a cute snap to your girlfriend. When you try to take a snap, you realize that there’s nothing. There are no lenses or filters at all. Witnessing this would be quite unbelievable and shocking.
To use Snapchat filters:
Open the camera section in the app, take a photo or record a video, and swipe left or right to browse and apply different filters. You can layer multiple filters by holding one filter and swiping with another finger. Finally, tap the arrow button to send the photo or add it to your story.
To use Snapchat lenses:
Open the camera, look for the smiley face icon, align your face, and tap on lenses to see the effect in real-time. Voice changer lenses only work for videos. After capturing, tap the button to send or add to your story.
Today, you will learn how to use Snapchat filters and lenses and where to find more of them. But before we jump into our main topic, let’s understand the filters and lenses of Snapchat. Are they similar or different from each other?
Difference Between Snapchat Filter And Lenses
Snapchat is known for its captivating and fascinating features, including filters, lenses, and mind-blowing Cameos. While these features attract a large user base, there is often confusion surrounding the terms “filter” and “lenses.” Many Snapchat users mistakenly consider them the same, but they are different.
Filters and lenses, referred to as Snapchat filters, have slight distinctions in functionality and usage. So, let’s explore the differences between these two popular features and how they work.
1. Snapchat Filters
Snapchat filters are static image overlays applied on top of photos and videos. When you use a filter, it adds visual effects and sometimes includes written words. Filters only apply to the surface area of a photo or video and not specifically to your face or other elements. Typically, you can categorize Snapchat filters into two different types:
Default: These default filters are accessible to all Snapchat users worldwide. They utilize color tones, temperature, and time to enhance the appearance of your photos or videos. To use them, simply select a pre-existing photo or capture a new one and apply the desired filter.
Geofilters: Geofilters are similar to regular filters in terms of functionality but specific to certain geographical locations. These filters can only be used within a designated radius based on location. The availability of geofilters is determined by the filter’s creator or designer, who sets the specific area or location where it can be used.
For example, let’s consider a filter designed exclusively for your city. This filter is restricted to use only within your city area. If you travel far away from your city, you will not have access to it. Does this clarify the concept?
Therefore, enabling your location settings on Snapchat can unlock available and additional filters based on your current location.
2. Snapchat Lenses
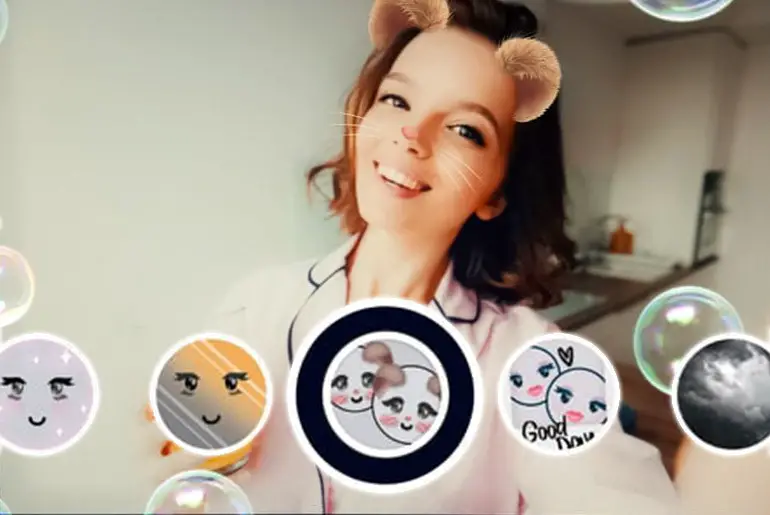
On the other hand, Snapchat lenses are animated reality effects that typically overlay and alter your face. If you’ve ever encountered a snap where your friend appears with dog ears, nose, and tongue, that’s a Snapchat lens. While commonly referred to as the “dog filter,” it is a lens.
Lenses on Snapchat offer users a range of face-morphing effects while capturing snaps or videos. Selecting a lens activates before you take a snap, allowing you to preview how the lens will look on you.
A wide variety of lenses are available on Snapchat, including animals, funny expressions, sad emotions, birthday-themed, and many more. Snapchat also allows you to create your own lenses for special occasions or specific purposes, which can be quite intriguing.
Now that you clearly understand the differences between filters and lenses, you can still refer to lenses as “filters” if you prefer. Ultimately, it’s your choice, but it’s important to recognize the distinctions between them.
Also Read: How To Unlock The Butterflies Lens On Snapchat?
How To Activate Snapchat Filters?
To begin using Snapchat filters, you must first activate them. By default, only eight filters are accessible. However, if you want access to additional filters beyond the location-based geofilters we discussed, you must activate them through the settings.
Here’s how you can do that:
Step 1: Launch Snapchat App
Open the Snapchat app and navigate to the Profile icon in the upper left corner.
Step 2: Go To Settings
Tap on the Settings gear icon situated in the upper right corner.
Step 3: Click On Manage Option
Under “Additional Services,” select the “Manage” option.
Step 4: Select On Slider
Tap on the slider to enable filters.
It’s worth noting that Snapchat lenses are already activated by default, so you don’t need to take additional steps to use them.
Alternative Method
You must enable your location settings if you wish to use Geofilters and access more filters. Geofilters are specifically available within certain areas. Here’s how you can turn on location for Android and iOS devices to use Geofilters:
Android Device: Follow this path: Settings > Location > Toggle on.
IOS Device: Follow this path: Settings > Privacy > Location Service > Snapchat > While Using the App
Also Read: How To Add And Hide Birthday On Snapchat?
How To Use Snapchat Filters?
Now that you understand how Snapchat filters and lenses work and how to activate filters let’s dive into using Snapchat filters. It’s a simple process, so let’s go through the steps:
Step 1: Open Camera
After activating the filters, open the camera section in the Snapchat app.
Step 2: Capture Media
Take a photo by tapping the circle at the bottom, or record a short video to see the filters in action.
Step 3: Swipe Left Or Right For Filters
Swipe left or right to browse and apply different filters. Choose the filter that best suits your photo or video.
Step 4: Use Multiple Filters
If you want to use multiple filters on the same photo, hold one filter with one hand and continue swiping left or right with the other hand to add another filter. Release your finger from the first filter to apply the second one. This way, you can have two filters simultaneously on a single photo.
Step 5: Tap On Blue And White Arrow
Once you are satisfied with the filters applied, tap on the blue and white arrow button at the screen’s bottom right corner.
Step 6: Send Photos To Your Snapchat Friends
You can now send the photo to your friends or add it to your Snapchat story.
Remember that filters’ availability may vary depending on your location. To explore the filters available in your area, ensure that your Geo-location is turned on by enabling your location settings.
For example, specific filters may be available during Halloween but not Christmas. This way, you can discover and use filters specific to your location.
Also Read: Trending Snapchat Filters and Lenses
How To Use Snapchat Lenses?
Now, let’s explore how to use Snapchat lenses, which offer real-time special effects for your photos and videos. Unlike filters, lenses are applied while capturing the content. They can transform your appearance in various ways, such as adding animal features or creating clone versions of yourself.
It’s important to note that Snapchat constantly updates its lenses so that they may change over time. Some lenses may be removed with app updates, but there are always new and engaging lenses to discover. However, popular lenses like the dog filter, face swap filter, and flower crown have remained consistently available.
Are you excited to try out lenses on your snaps and videos? Let’s dive into the steps:
Step 1: Open Snapchat’s Camera
Open the Snapchat camera and switch to the front-facing camera if desired.
Step 2: Navigate Smily Icon
Look for the smiley face icon located next to the capture button.
Step 3: Tap On Lens
Align your face on the screen and tap on a lens from the available options. You will see the lens effect applied to your face.
Step 4: Capture Snap With Lens
Tap on the lens once to capture a snap with the lens effect. For a short video, hold down the lens button for a longer duration.
Note: If you use a voice changer lens, remember it only works for videos, not photos. While capturing the video, say something, and your voice will be modified accordingly.
Step 5: Send It To Your Snapchat Friends
Once satisfied with your snap or video, tap the blue and white button at the bottom right of the screen to send it to your friends or add it to your story.
Using Snapchat lenses is quite simple and fun! Feel free to explore all the available lenses and experiment with different effects on your photos and videos.
You can also apply filters to your snaps or videos with lenses. After capturing a snap with a lens, swipe left or right to access the filters. It’s as simple as that!
Also Read: How to get new and old Snapchat filters or lenses back on Snapchat?
How To Unlock More Snapchat Filters And Lenses?
You may get bored with the same filters and lenses on Snapchat and want to explore new and exciting options. Several ways exist to unlock more filters and lenses. Here are some methods you can try:
Snapchat Lens Studio
Snapchat Lens Studio is the perfect tool if you’re feeling creative and want to design your lenses and filters. With Lens Studio, you can create customized lenses and filters and use them on Snapchat. You’ll receive a unique snapcode for your creations, allowing others to scan and use your lenses. Check out my article on creating lenses on Snapchat for detailed instructions.
GemLens
GemLens is a great resource for finding various social media filters, including Snapchat filters. Visit the GemLens website and search for the desired filter. You can download the filter and apply it to your Snapchat. GemLens also offers Instagram filters, providing even more creative options.
Snapchat App
The Snapchat app offers users a range of filters and lenses to discover. Here’s how you can find and unlock them:
- Open the Snapchat app on your device.
- Tap on the smiley face icon in the camera section.
- Look for the “Explorer” option at the screen’s bottom right corner.
- Browse through the available lenses or use the search function to find specific ones.
Also Read: How To Put Snapchat Filters On Camera Roll Pictures?
How To Scan Snapcode Of Filter Or Lenses?
Scanning Snapcodes is a convenient way to quickly access and use lenses or filters created by others. It allows you to enjoy various creative effects and enhancements in your Snapchat content. If you’re wondering how to scan and use those lenses or images, here’s a quick guide:
- Open your Snapchat camera when you come across a Snapcode for a lens or filter, whether on a website or shared by a friend on social media.
- Make sure the Snapcode is positioned within the frame of your camera so that it is visible and easily detected.
- Tap and hold your finger on the screen, specifically on the Snapcode.
- Allow Snapchat to scan the Snapcode. You may need to keep your finger on the screen until the scanning process is complete.
- Once the Snapcode is successfully scanned, the lens or filter associated with it will be activated on your Snapchat. You can now use it in your photos or videos.
Also Read: How To Fix Snapchat “Oops! We Cannot Find A Matching Username” Issue?
Do Filters And Lenses Work In Real-Time During Video Calls Or Chats?
Yes, you can use filters and lenses in real time during video calls or chats on Snapchat. When you are engaged in a video call or chat, you can access and apply filters and lenses to add fun and interactive elements to your conversations. Whether you want to wear a virtual hat, add face effects, or enhance the background, filters and lenses provide a dynamic and engaging experience.
Activate filters and lenses during your conversations to add a touch of creativity and make the interaction more enjoyable. You and the person you’re interacting with can actively enjoy these features in real time, whether making funny faces, expressing emotions, or simply having fun.
Also Read: How To Remove And Block Your Friends On Snapchat?
Can I Use Snapchat Filters And Lenses In Another Social Media?
No, Snapchat filters and lenses are exclusive to the Snapchat platform and cannot be directly used on other social media platforms. The filters and lenses are specifically designed and optimized for Snapchat’s camera and software, making them unavailable for other social media apps or websites.
However, you can save and share your snaps on other social media platforms like Facebook, Instagram, or Twitter. Sharing a snap will appear as a regular photo or video without interactive filters and lenses.
So, while you cannot use Snapchat filters and lenses directly on other social media platforms, you can still showcase your creativity by sharing your snaps with friends and followers on different platforms.
Also Read: How to Back up Your Camera Roll On Snapchat?
Frequently Asked Questions (FAQs)
Here are some of the frequently asked questions related to Snapchat filters and lenses; and are as follows:
Are Lenses Different From Filters on Snapchat?
Yes, lenses are AR effects that change your face in real time, while filters are pre-made designs you can apply to your snaps after taking them.
Why Doesn’t My Snapchat Have All The Filters?
If you don’t have all the filters on your Snapchat, it could be because some filters have been removed from the app. It’s essential to note that Snapchat regularly removes old filters and introduces new ones monthly.
Can You Favorite Snapchat Filter?
Yes, you can. Just tap on the star icon in the upper left corner to mark a filter as your favorite.
Can You Use Snapchat Filter On Camera Roll Photos?
Yes, using the built-in feature, you can easily use Snapchat Filter on camera roll photos.
Conclusion
Lastly, Snapchat filters and lenses are valuable features that enhance our Snapchat experience. They provide entertainment and help us pass the time. Now that you have learned how to use filters and lenses, create captivating photos that will attract more followers on Snapchat.
Remember to enable Geolocation to access additional filters based on your location. I hope you found this article helpful. Please let us know your thoughts in the comments below. Thank you for reading!

