Have you been fascinated with the reels on Instagram and wish you could also make one? Do you want to know more about Instagram reels? Then this article is for you. We will go over how to create Instagram reels quickly and easily.
Answer:
There are several approaches to making Instagram reels. We recommend five steps for creating Instagram reels.
1. Go to your Instagram reels.
2. Create or upload video/photo clips.
3. Edit your reel.
4. Modify the reel settings.
5. Share your final reel.
What are Instagram Reels?
Instagram reels are short video clips that can last up to 60 seconds. A reel is a feature for making, discovering, and sharing short and funny videos on Instagram. Reels are made using various special editing programs and a large soundtrack library that includes well-known songs.
Similarly, reels include multiple video clips, subtitles, interactive background stickers, and other features. Instagram reels can grow your following, advertise your goods and services, boost engagement, and more. They are extremely useful for increasing brand engagement and expanding your reach.
Instagram never lets its users down by introducing new and exciting features. For example, Instagram debuted its first reel in early 2022 and users are now waiting for the direct feature that will allow them to add link to Instagram Reel for business promotions. The reels are becoming increasingly popular, and users are more engaged with video posts than any other type of content, which helps keep them on Instagram.
How Do You Make Instagram Reels?
Instagram reels have recently gained popularity, and many users want to create their own. You can create the Instagram reel by following the steps below.
Step 1: Go To Instagram Reels
There are three methods for creating your Instagram reel. They are;
Method 1: Open Instagram Stories Camera
Following are the steps to open the Instagram stories camera.
1. First, launch the Instagram app on your device.

2. Next, navigate to the top left corner and select the “Your story” section.

3. Later, navigate the camera to reels from the filters option by clicking on the camera section.

Method 2: Tap On The Plus Icon
Following are the steps to open the Instagram reel camera by tapping the plus icon on Instagram.
1. Log in to your Instagram account.

2. Click the plus button in the lower middle section of the screen.

3. Later, in the middle right section, tap on the camera icon.
![]()
4. Finally, swipe left to access the Instagram reel camera. Then the reel camera will open directly.

Method 3: Swipe Left To Right From The Home Page
Following are the steps to open the Instagram reel camera from swiping left to right from the home page.
1. First, open the Instagram app on your device.

2. Later, swipe left to right to access the Instagram story camera.

3. Then, tap on the reels section.

Step 2: Create or Upload Video/Photo Clips
In the second step, you can create the video for the reel. To make an Instagram reel, you can record or upload your video or photo content in two methods.
Method 1: Record Video With A Reel Camera
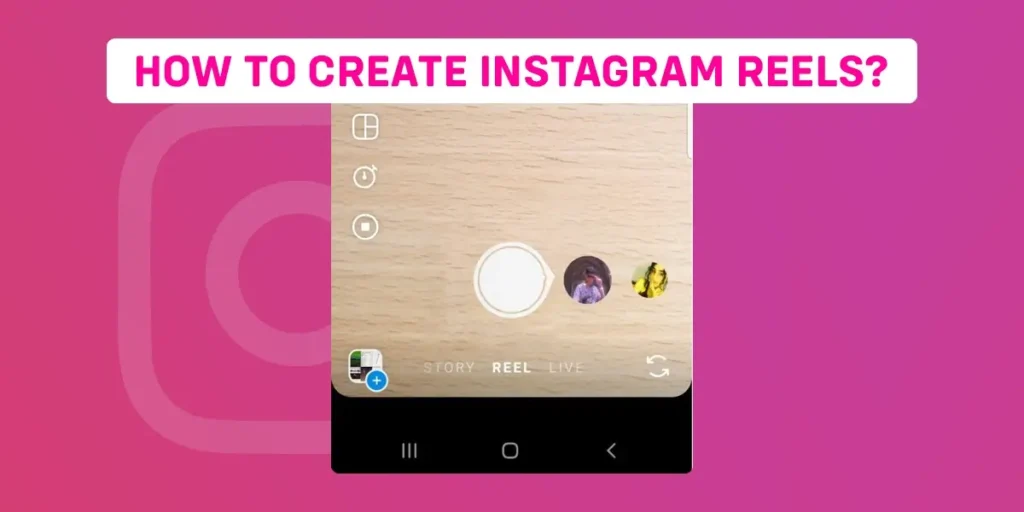
Once you navigate the reel camera using one of the three methods mentioned above, you can record the reel’s video.
You can record video with a reel camera by following the steps:
Step 1: Select the length (15-second) option.

Select the 15-second option on the reel camera’s left-hand vertical bar before beginning a recording. You’ll find 30, 60, and 90 seconds of recording time. You can choose one of the options based on your intended reel length.
Step 2: Set The Timer

The timer will begin counting down once you press the record button. The recording circle will automatically stop recording the video reel when the video length is reached. You can set a timer countdown up to 10s before starting a recording.
Step 3: Adjust Video Speed

Before recording video content, you can adjust the video speed and layout. For example, you can select a video speed twice or three times.
Step 4: Click On The Recording Button

Once all the sections have been set, you can start recording the reel by clicking the recording button (a circle with a white fill).
Method 2: Upload The Video
If you have accessed the reel camera using the method “Your Story” and “swipe left to right,” you can upload the video from the lower left corner.
However, you can upload the video by following the steps.
1. Click on the “plus” icon in the bottom menu bar options.

2. Then, click on the camera icon shown on the screen.
![]()
3. Choose the Reels option.

4. Choose the video content for your Instagram reel by clicking on the plus icon available in the bottom left corner of the screen.
![]()
5. Choose the video that you want to upload for an Instagram reel.

Step 3: Edit Your Reel
After recording or uploading your video content, you can edit the video with Reels’ editing tools. Here are some of the editing options mentioned below.
Select The Music Icon
You can add music or soundtracks to the video content from the top bar of the editing options. Several pieces of music are available in the Instagram Music Library. In addition, you can find your favorite music or soundtracks by using the search box. Here are the following steps to add music to your Instagram reel.
1. Select the music which you want to apply to your Instagram reel.

2. After you’ve chosen the inserted music, you can also select which section of the song to play. Later, click on the “done” option.

To add other features to your Instagram reel, you can proceed through the following steps, click the star icon to add AR effects and filter options to your Instagram reels.
You can add text and stickers by selecting those icons from the editing menu. Later, click the next section, and you’ll be able to share your Instagram reels.
Step 4: Modify Your Reel Settings
After editing your reels, you can adjust the reel settings, such as writing a caption, tagging people in your reel, or adding location. Then you’re ready to share your reels on Instagram.
Step 5: Share Your Final Reel
Once you’ve finished all of the above steps for your Instagram reels, then, at the bottom of the screen, click the “Share” button. Then your reel will be shared on Instagram.
How Do You Save Instagram Reels On Your Phone Storage?
You can save your Instagram reels to your device’s storage before sharing them on Instagram. After editing your Instagram reel, click the download arrow on the top horizontal reel editor bar. The Instagram reel will save to your device after you click the download arrow. You can watch those reels whenever and wherever you want later.
How Do You Create Instagram Photo Reels?
You can also make Instagram reels from photos. You must create Instagram reels with one or more photos. The detailed steps for creating Instagram reels with photos are as follows.
Step 1: Log in to the Instagram app on your device.

Step 2: Click the “plus” button in the bottom menu bar.

Step 3: Next, click the camera icon and then slide the post option to find the reel tab.
![]()
![]()
Step 4: Click on the plus icon in the lower left corner.
![]()
Step 5: Choose the images you want to use to create an Instagram reel and click on the next option.


Step 6: Change the duration of each photo’s playback by dragging the slider below 1-5 seconds.

Step 7: Using the reel editor tool, you can add music, text, AR effects, stickers, and other features to your Instagram reel.

Step 8: Review your Instagram reel, and click on the share button to publish your Instagram photo reel.

How Do You Get To The Content Of Your Earlier Instagram Reels?
Your profile’s menu will contain a separate “reels” tab to find your Instagram reels. To view previously posted reels on Instagram, follow the steps outlined below.
Step 1: Go to the Instagram app on your device.

Step 2: Click on the profile icon in the bottom right corner.

Step 3: Then select the reel icon (located next to the post icon). You can find all the previously posted Instagram reels in the reels section.
![]()
Tips for making good Instagram reels:
1. Create a strategy that includes good video content for reels.
2. Select appropriate music or a soundtrack for your reels.
3. Use effective transitions and filters to draw the attention of other users.
4. Avoid issues with Instagram music copyright when creating an Instagram reel.
5. Regularly updating your Instagram app may help reduce Instagram reel, not working issues.
Frequently Asked Questions (FAQs)
After reading the preceding section of the article, you may have several questions about Instagram reels. Here are some possible answers in the “frequently asked questions” section regarding your questions.
What Happens When I Share An Instagram Reel From A Public Account?
Instagram accounts are classified into two types: public accounts and private accounts. If you use a public account and share your Instagram reel, your reels will have more room to grow. Similarly, your reel has the potential to be seen and discovered by a larger community. When you use hashtags, effects, or songs to share your reel, it may display on dedicated pages when an individual clicks on that song, hashtag, or effect.
When you have a private account, reels adhere to your Instagram privacy settings, and as a result, your reels cannot be distributed to a large community, and others cannot share your reels.
How Long Should An Instagram Reel Be?
Instagram’s maximum time limit is 90 seconds. On the other hand, the time limit for Instagram reels can be set before recording the reel. There are options for making an Instagram reel of 15, 30, 60, or 90 seconds. You can create an Instagram reel as needed by setting a time limit.
Is the music in the Instagram Music Library free of copyright violations?
Yes, the music in the Instagram Music Library is free of copyright violations. If the music is copyrighted, Instagram will restrict you from including the music in your reel. However, you can freely use that copyright-free music in your Instagram reels and stories.
Can I use a photo instead of a video in an Instagram reel?
Yes, you can use the photos to create Instagram reels. An Instagram reel should include more than one photo. For more information, follow the steps outlined above to create an Instagram reel with a photo section.
Can I Make Reels on a Desktop PC?
No, only the mobile version of Instagram currently supports creating reels.
Conclusion
We hope you found the article “How to Create an Instagram Reel” helpful and informative. This article will be very useful if you are new to Instagram and want to expand your business sites through Instagram. We will have a similar article for you in the following section. So please keep in touch with us. Thank you.

