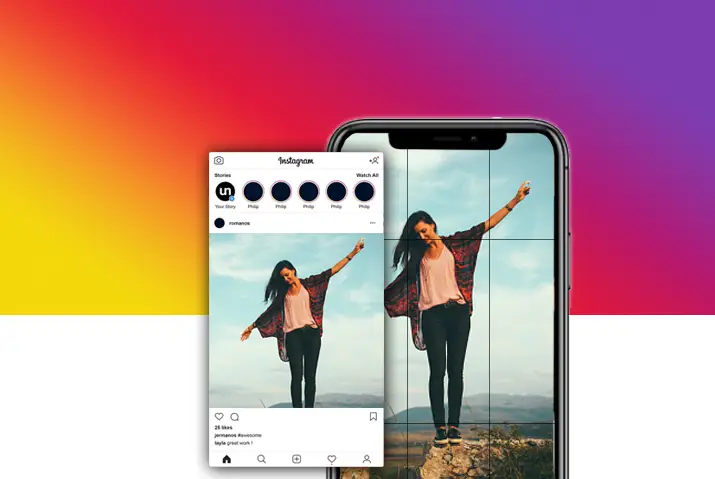
Instagram has the maximum aspect ratio of 4:5 on portrait photos. That means 4 pixels wide and 5 pixels tall. So, it restricts the uploading of very tall images vertically. It makes it difficult for you to upload full images or videos that are taken vertically from your phone, so we look into how to upload full photos on Instagram.
If your content is taller than the 4:5 aspect ratio, you should modify your content before posting on Instagram. Otherwise, it will automatically crop your images or videos to 4:5. So, you can use different tools to resize and upload full content on Instagram, especially photos.
Instagram Image Sizes
You can upload an image size of 320 pixels minimum to 1080 pixels maximum on Instagram. If you upload below 320 pixels then it will enlarge and if you upload larger than 1080 pixels, it will resize to fit in the screen. So, you do not have to worry unless your content is cropped.
Before Instagram used to allow only a 1:1 aspect ratio. But now you can upload portraits as well as landscape images in different sizes. And you can choose between 3 aspect ratios that are 1:1 for square, 1.91:1 for landscape, and 4:5 for portrait images. Also, you can find more details about these options below.
1:1 Square Images
The ideal size for a 1:1 square size image is 1080 pixels by 1080 pixels. This is the traditional image size of Instagram. Before it was a problem for users as Instagram crops the image into this size. But now you can take pictures in this ratio using your iOS or Android devices.
1.91:1 Landscape Images
The ideal image size for 1.91:1 aspect ratio is 1080 pixels by 608 pixels. Most of the landscape images are in the 16:9 ratio that is 1920 pixels wide and 1080 pixels tall. So, when you add horizontal pictures in a 1.91:1 ratio it will automatically add a black border around it.
4:5 Portrait Images
The aspect ratio of portrait images on Instagram is 4:5 aspect ratio that is 1080 pixels wide and 1350 pixels tall. It is easy to post in this ratio as you can take portrait photos with your mobile. Though some parts will be cropped to fit in this ratio.
Instagram Story Size
Unlike posts, there is only one size available for an Instagram story. The ideal size for the Instagram story is 1080 pixels wide and 1920 pixels tall that is a 9:16 ratio. However, you can share a story size between 1.91:1 to 9:16 aspect ratio. Else it will automatically add a border to the picture of a small size to fill the black space.
Instagram stories are viewed vertically so you should always upload portrait images for stories. It does not look good if you add landscape images to Instagram stories. So, it is always better to use the 9:16 aspect ratio on Instagram stories. You can also look into how to change the background color of Instagram stories while posting your pictures there.
How To Upload Correct Sized Photos On Instagram?
After knowing all about Instagram image sizes, you may think that it is hard to upload the correct sized photo on Instagram. But it is not a matter to worry about as there are a lot of photo editing tools available. It does not need a lot of effort so you can easily modify your images to upload them on Instagram.
There are various Insta-friendly photo editors without having images cropped. The following are some photo editing tools for Instagram.
Square InPic
Square InPic is one of the best photo editing tools for Instagram to resize photos without cropping. It is best at creating square-sized Instagram photos without cropping your original photos. Also, there are other features such as emojis, filters, etc. that enhance your photos for Instagram.
Square Pic
It is also the same as Square InPic which is used to convert any photo to square sized photo for Instagram. But there are different options like black, white, or blur backgrounds. Also, you can use these backgrounds for your photo to upload on Instagram.
No Crop & Square For Instagram
This is also a photo editor tool for Instagram which comes with a variety of features. It is used to resize images without cropping and enhance the quality of pictures. Along with resizing photos, it also allows you to create collages, add filters and effects to your photos. There are around 300 background patterns available for you on this app.
Auto-Cropping On Instagram
Auto Cropping is an in-built feature of Instagram which adds a black border to your image rather than resizing it. It automatically crops and resizes to fit in the dimension before uploading it on Instagram.
People don’t care about resizing photos for Instagram so they randomly post without editing. However, it may affect the visual of their Instagram feed. So, it is better to follow a consistent pattern for all your Instagram posts.
For example, if you want to post landscape images with auto cropped black background then make it your theme. Like this, your Instagram feed will look consistent and you don’t have to use any editing tools to resize your images.
How To Fit Full Photo On Instagram?
Nowadays most smartphones are bigger so the images captured are also taller. That is why the full portrait images do not fit in the Instagram post as the maximum aspect ratio is 4:5. When you post that image without resizing, Instagram will crop itself and a full-size image will not be uploaded.
So, if you want to fit in the whole picture on Instagram you can use the ‘Kapwing Resizer’ tool. It will add a white background to resize your image to fit in the 4:5 ratio. The following are the steps to use Kapwing Resizer to fit a full photo on Instagram.
Step 1: Open Kapwing Resizer
Open Kapwing Resizer on your device.
Step 2: Upload Photo
Click on the ‘Upload File’ tab to choose your image to upload. Also, you can import from a URL next to ‘Upload File’.
Step 3: Kapwing Studio Editor
After uploading you will be taken to ‘Kapwing Studio Editor’ where you will see the preview of your photo.
Step 4: Resize To 4:5 Aspect Ratio
In the ‘Output Size’ section, select the 4:5 option. This will make your image use maximum vertical space without resizing the image.
Step 5: Change Background
Once you select the size option it will add a white background to your image. Also, you can change it to any color.
Step 6: Export Photo
Now you can click on the ‘Export Image’ button in red color at the top of the screen. After processing your resized photo will be available to download.
Step 7: Sign In To Kapwing Account
If you do not sign in to Kapwing it will add a watermark to your photo while downloading. You can also sign in with your ‘Google’ or ‘Facebook’ account.
When you upload that picture on the Instagram post, you can click on expand arrows or pinch to fit the full photo. While publishing the photo, Instagram will resize the width to fit in the screen. Then the white background will blend with Instagram and the full photo will appear without cropping.
How To Resize Image Without Cropping?
If you have a 3:4 landscape photo, you have to either crop or add background to fit in the Instagram post. But there is a technique to resize your image without cropping and prevent it from bad composition. There is a tool called Intelligent Resizer(iResizer) which can fit an image on Instagram without cropping and a border.
Step 1: Download iResizer
Download iResizer for any device.
Step 2: Install iResizer
Install iResizer on your device.
Step 3: Load Image On iResizer
Load your image on iResizer from the ‘File’ menu on the top.
Step 4: Select Object To Protect From Distortion
You can select an object from the image using the ‘Green Selection Tool’ to mark unscaled.
Step 5: Change The Aspect Ratio
Now click on the ‘Resize’ option on the menu at the top row and select the 1:1 ratio of the output image. Then click on ‘Ok’. There are two options: ‘Maximize’ for 800 x 800pixels or ‘Minimize’ for 600 x 600pixels.
Step 6: Upload On Instagram
You can upload the picture on Instagram without having them crop or add a border.
How To Fit Photo On Instagram With Or Without Borders?
Landscape photos with a 16:9 ratio will be cropped up on Instagram. And this will spoil your post on Instagram so there is a way to solve this issue with an online tool ‘Clideo’. It can add a white, black, blurred, or colored border to your image to fit in an Instagram post. Also, it can chop parts of the image that you don’t want.
‘Clideo’ lets you resize any images that are stored on your device or via a web browser for free. So, you don’t have to download any other tools or software to resize your image. Below are the steps on how to use ‘Clideo’ to fit a full picture on Instagram.
Step 1: Open ‘Clideo’ On Web Browser
Search for ‘Clideo’ on the search bar of any web browser and open.
Step 2: Choose A Picture
Click on the ‘Choose file’ tab at the center of the page.
Step 3: Upload A Picture
Choose any picture to upload from your file. You can also choose ‘Google Drive’ or ‘Dropbox’ from the down arrow option next to ‘Choose File’.
Step 4: Choose The Settings
When your file upload completes, select Instagram from the list of social media platforms. It is under ‘Resize for’ on the right-hand side menu. Then select the necessary settings.
Step 5: Fill Without Border
If you want your image to fit on Instagram without a border then click on ‘Fill’ under ‘Crop options’
Step 6: Export Picture
Once you are done click on the ‘Export’ button below.
Step 7: Remove Watermark
If you don’t want a watermark on your picture, click on ‘Remove Watermark’. To remove it, you have to sign in with either ‘Google’, ‘Facebook’ or ‘Apple’ id.
Step 8: Edit Picture
If you think you have missed out on something then you can go back to editing by clicking on the ‘Edit’ option.
Step 9: Download Picture
Finally, you can download the picture with the ‘Download’ option and save it. Here you can also save the picture to ‘Google Drive’ or ‘Dropbox’ with the down arrow option next to ‘Download’.
Frequently Asked Questions
While uploading a full photo on Instagram there may be some questions on your mind. So, here we have answered the frequently asked questions for you.
How to post multiple landscape and portrait photos on Instagram?
While posting multiple pictures on Instagram the aspect ratio of each image has to be the same. But you may not want to crop them or add background to the image. So, before posting multiple pictures you need to use a tool to resize them first. You can either use ‘Kapwing Resizer’ or ‘iResizer’ to resize and post multiple photos on Instagram.
Conclusion
Thus, if you want to upload a full photo on Instagram either you have to correct the size using tools. Or you can add background to them otherwise Instagram will automatically crop your image.


