Facebook and Instagram are closely integrated as Instagram was acquired by Facebook in 2012, and are both under the company Meta. From then onwards both Facebook and Instagram can be inter-connected but you can also keep your social profiles separate. If your profiles are interconnected, you can see how to unlink Facebook page from Instagram.
At the point when your Instagram and Facebook accounts are connected, it’s not difficult to cross-post, discover Facebook friends to connect with on Instagram, and post Instagram stories as Facebook stories and many more. But if you have any security concerns or you want to separate down your social media activity you can unlink your Facebook page from Instagram.
How To Unlink Facebook From Your Instagram Account Using iOS or Android Device?
You can unlike Facebook page from Instagram account only from the Instagram app. There’s no option for this on the Facebook mobile app, the Facebook desktop app, or Instagram on the desktop. So, here’s how to unlink Facebook from your Instagram account:
Step 1: Launch An Instagram App
Launch An Instagram App on your iOS or Android device from the app menu.
Step 2: Go To Your Profile
Tap on your ‘Profile’ icon which is on the bottom-right corner of your app.
Step 3: Tap On The ‘Three Lines’ Menu
Tap on the ‘three lines’ menu which is on the top-right corner of your Profile page.
Step 4: Tap On The ‘Settings’
Tap on the ‘Settings’ on the first option.
Step 5: Tap On The Account
Tap on the ‘Account’ option under the ‘Settings’.
Step 6: Tap On ‘Sharing To Other Apps’
Tap on the ‘Sharing to other apps’ option under ‘Account’
Step 7: Tap On The Facebook
Tap on the ‘Facebook’ icon under ‘Linked Accounts’.
Step 8: Tap On The ‘Accounts Center’
Tap on the ‘Accounts Centre’ option at the bottom of the screen.
Step 9: Tap on ‘Account and Profiles’
Tap on the ‘Accounts and Profile’ options under ‘Accounts Centre’.
Step 10: Choose Facebook Account
Now tap on the ‘Facebook Account’ that you want to unlink from your Instagram account
Step 11: Remove From Accounts Centre
Tap on the ‘Remove From Accounts Centre’ option.
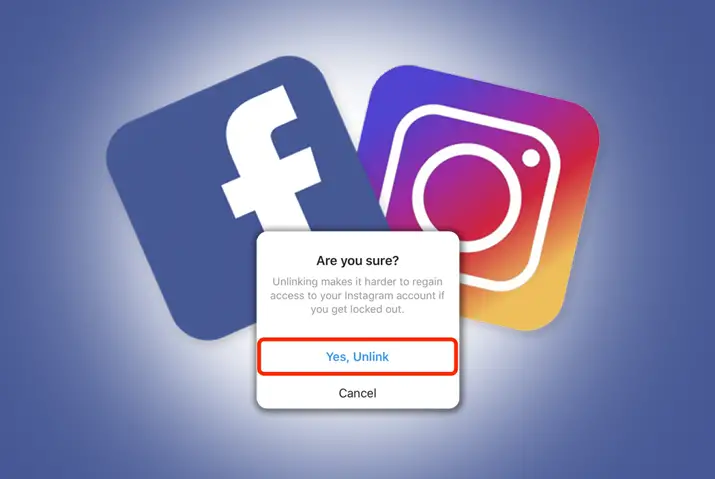
Step 12: Select ‘Yes’ To Confirm
Then select ‘Yes, Unlink’, to confirm.
Now your Facebook account is unlinked from your Instagram account.
How To Unlink Facebook From Your Instagram Account Using PC?
Similarly, you can also unlink Facebook page from Instagram using a PC. You can use any browser to do this. So, here are the steps to unlink your Facebook account from your Instagram account using a PC.
Step 1: Open Your PC Browser
Open any of your browsers and go to instagram.com from your address bar.
Step 2: Login To Instagram Account
Log in to your Instagram account with your ‘username’ and ‘password’.
Step 3: Go To Your Profile
Click on your “Profile” icon which is on the top-right corner of your Instagram page.
Step 4: Click On ‘Settings’
Now click on the ‘Settings’ under your ‘Profile’ icon.
Step 5: Click On ‘Accounts Center’
Scroll down and click on the ‘Accounts Center’ option which is in blue text on the left pane.
Step 6: Choose Your Account
Choose your account and click on the ‘three-dot’ option right to your account.
Step 7: Remove From Account Center
Click on the ‘Remove From Account Center’ in the pop-up window and confirm.
Now your Facebook and Instagram accounts are unlinked from each other.
How To Limit Your Instagram and Facebook Interaction?
Assuming you need to keep some Instagram-Facebook connection, there are some customization choices. For instance, you can stop sharing your posts automatically on Facebook, yet have Facebook friends show up as follower suggestions. You’ll likewise stay apparent to Facebook friends on Instagram. Here are the steps to limit your Instagram and Facebook interaction to unlike Facebook page from Instagram.
Step 1: Launch An Instagram App
Launch an Instagram app from the app menu on your iOS or Android devices.
Step 2: Go To Your Profile
Tap on the ‘Profile’ icon which is on the bottom right corner of your app.
Step 3: Tap On The ‘Three Lines’ Menu
Tap on the ‘three lines’ menu which is on the top-right corner of your ‘Profile’.
Step 4: Tap On The ‘Settings’
Tap on the ‘Settings’ option on the three lines menu.
Step 5: Tap On The ‘Account’ Option
Tap on the ‘Account’ option which is under the ‘Settings’.
Step 6: Tap On ‘Linked Accounts’
Tap on the ‘Linked Accounts’ option from ‘Account’.
Step 7: Tap On The ‘Facebook’ Icon
Tap on the ‘Facebook’ icon which is under the ‘Linked Accounts’.
Step 8: Share Your Story To Facebook
Under the Facebook icon, there is an option “Your Instagram Story”. You can toggle off the option if you don’t want to share your Instagram story to Facebook automatically.
Step 9: Share Your Posts To Facebook
Also, there is an option, “Your Instagram Posts”. You can toggle off the option if you don’t want to share your Instagram post to Facebook automatically.
What Are The Other Connected Accounts On Instagram?
Other than Facebook, you can also connect Twitter, Tumblr, Amega, and Ok.ru to your Instagram account. This connection helps you to share the same content on multiple platforms with one click.
Among them, Twitter allows you to share with character limitations only, and Tumblr auto-generates the post for you. Similarly, Ameba is like a Tumblr with a photo-specific angle and OK.ru is a social network service used for classmates mainly in Russia.
How To Link Instagram To Personal Or Business Facebook Accounts?
You can either link to a personal Facebook account or a business account from an Instagram app. To link a business account, you must first switch to a business account on Instagram. Below are the steps to switch to a Business Account on Instagram.
Step 1: Launch An Instagram App
Launch an Instagram app from your app menu.
Step 2: Go To Your Profile
Tap on the ‘Profile’ icon which is on the bottom-right corner of your screen.
Step 3: Go To Settings
Tap on the ‘three lines’ from the pop-up on your Profile icon and tap on ‘Settings’.
Step 4: Tap On ‘Account’
Tap on the ‘Account’ option under ‘Settings’.
Step 5: Switch To Professional Account
Now tap on the ‘Switch to Professional Account’.
Step 6: Change Category For Your Profile
You can choose the Instagram category according to your business product or service from “Suggested” or you can type on the search box.
Step 7: Select Business Option
Select Business on the “Are you a Business” page and click on Next.
Step 8: Enter Your Company Information
Now you can enter your company information and select the business Facebook account associated with your Instagram account.
Step 9: Tap Done
You can add additional details about your brand and tap on “Done”.
Now your Instagram account is successfully converted into a Business account. After this, you can link your Business account the same as your personal account as shown in the steps above.
Does Unlink On Instagram Account Unlink You From Facebook?
When you unlink a Facebook account from your Instagram profile, you think that you have unlinked your Facebook account from your Instagram profile. But clicking on ‘Unlink Account’ does not unlink a Facebook account from Instagram, because it is not possible to separate the two accounts.
Even if you have never linked your Facebook and Instagram accounts, they are naturally connected. It is because the number of data that Facebook collects through its multiple services is more than enough to accurately identify users’ different accounts and link them to one another.
Even if you use different names, email addresses, or devices, Facebook can find out who is using the account and whether they have accounts on other Facebook-owned apps or not. It is because Facebook and Instagram share the same infrastructure, systems, and technology.
How To Remove Instagram Posts From Facebook Using iOS or Android Device?
Even if you have unlinked your Facebook account from Instagram your Facebook profile features some posts from Instagram. It is because you have selected the option to share your every Instagram post on Facebook. And, it does not delete your previously shared Instagram posts on Facebook.
To remove all your Instagram posts from Facebook, you have to delete them manually from your Facebook account. To remove Instagram posts from Facebook you have to do the following steps using your iOS or Android device.
Step 1: Launch Your Facebook App
Launch your Facebook app from the app menu of your iOS or Android device.
Step 2: Tap On The Three Lines Menu
Tap on the ‘three lines’ menu on the top right corner of the app.
Step 3: Go To Your Facebook Profile
Tap on your ‘Profile’ icon which is on the top of the page on Android and bottom on iOS devices.
Step 4: Tap On Photos
On your ‘Profile’ page tap on the Photos tab which is under the ‘New Posts’ option.
Step 5: Choose The Albums Tab
Tap on the ‘Albums’ tab where you can find the different albums.
Step 6: Navigate To Instagram Photos
Under the Albums, you can tap on the “Instagram Photos” album.
Step 7: Open The Photo
Now you tap on the photo you want to delete and you can see a three-dot menu above the picture
Step 8: Delete The Photo
You can tap on the “ Delete Photo” option on it. Repeat the process for each photo.
How to Remove Instagram Posts From Facebook Using PC
You can also remove Instagram posts from Facebook by using your PC browser. From here you can delete all your Instagram posts in one click without having to repeat the process. So, you can do the following steps to remove all of your Instagram posts from Facebook at once.
Step 1: Open Facebook On Browser
Open your Facebook account from your PC browser.
Step 2: Log In To Your Facebook Account
Log in to your Facebook account with your ‘username’ and ‘password’.
Step 3: Go To Your Profile
Click on your ‘Profile’ icon which is on the left pane of your ‘Home’ page.
Step 4: Click On Photos
Click on the “Photos” under the create post option.
Step 5: Choose Albums
Click on the ‘Albums’ option under Photos.
Step 6: Go To Instagram Photos
Scroll down to ‘Instagram Photos’ and click on the ‘three-dot’ icon on the right side of the album.
Step 7: Click On Delete Album
Now click on the “Delete Album” option and confirm.
You can find that your Instagram photo album has been deleted.
Frequently Asked Questions
Some frequently asked questions on how to unlink Facebook page from Instagram are below.
How Can You Change Your Linked Instagram Account?
You can link multiple Facebook accounts with your Instagram account. To change the linked Facebook account on your Instagram, you have to unlink the current one and link the new one. You can choose by navigating to Linked Accounts on your Instagram.
Does Disconnecting Instagram From Facebook Remove The Posts From Facebook?
The answer is no as we have already discussed above. When an Instagram post is auto-shared on Facebook it becomes a Facebook post and you have to delete it from your Facebook account.
Conclusion
Thus, you can unlink your Facebook account from your Instagram account through various devices if you do not want to share your Instagram posts on Facebook. Also, you can limit the sharing of your Instagram posts to Facebook.

