Discord is an app where you can have text and voice chats with others. You can invite your friends to these chats or make public groups for different topics, like discussing games or anything you want to discuss. Discord also offers fun emotes to use in these groups. If you’re interested in creating servers on Discord, you can choose between private and public settings. Today, we will learn how to make a Discord server public.
Answer:
To make your Discord server public, you must have all the requirements, like 1000 members, verified email, 2FA, and an 8-week-old server. In Server Settings, enable Community. Complete setup, set rules, and notifications. Enable Discovery so your server appears in public listings for anyone to join.
If you want to learn more about how to make a Discord server public, follow along!
What Is A Public Discord Server?
A public Discord server is a server that anyone can join. Such servers are commonly used for gaming communities but are versatile for various purposes.
Public Discord servers welcome anyone without needing authentication or verification. Hence, these servers are accessible to anyone with an internet connection.
Contrasting private Discord servers, which necessitate an invitation or verification to join, public servers are open to all. This aspect makes public Discord servers an ideal choice for communities aiming to involve a broader audience in their discussions.
Also Read: How To Change Discord Background Theme?
Requirements To Make a Public Discord Server
Before delving into how to create a public Discord server, it’s important to understand the prerequisites you need to fulfill. Below is a comprehensive list of requirements to consider for publicizing your Discord server.
Bear in mind that these requirements are obligatory. Attempting to publicize your Discord server without meeting these criteria may result in a short-lived experience. Therefore, ensure you’ve met these prerequisites before publicizing your server on Discord.
- Your Discord server should have a minimum of 1000 members.
- You must possess a verified email account associated with Discord.
- Adherence to Discord’s community guidelines is essential.
- Enable two-factor authentication for your account.
- Your server must be at least eight weeks old to meet the time requirement.
To avoid any disputes and establish a standard for how engagement is supposed to be handled between members, it is encouraged to create a rules channel on Discord.
Also Read: How to Unlink Phone Number From Discord: Tips 101
How To Make A Discord Server Public?
Turning your Discord server public is a relatively straightforward process. However, before taking this step, it’s crucial to consider why you want to make your Discord server public. If the server’s purpose is solely for you and your friends, sticking to a private Discord server might be more suitable.
Public Discord servers are designed for larger communities, where individuals with shared interests gather, engage, and contribute their ideas, fostering connections.
There are two methods to make a public Discord server, which are listed below:
- Method 1: Make a Public Discord Server On a PC
- Method 2: Make a Public Discord Server On the Phone
Also Read: How To Delete A Discord Account? [All Methods]
How To Make A Public Discord Server On PC?
Before venturing into creating a public server on Discord, having your own private Discord server is necessary. Once you’ve established your private server, you can enable community interactions with other servers. This provides you with specific administrative tools to effectively moderate the server.
After setting up your server, the subsequent step involves making it discoverable so other users can locate and join it. The ‘Server Discovery’ tool makes joining a Discord server without an invite possible. This tool streamlines the process of finding servers quickly and easily.
And in case the server becomes quite active, there’s no need to worry. ‘Server Insights’ offers valuable data on the frequency of interactions and the activities that tend to engage members, contributing to their prolonged involvement.
Now that we’ve covered the fundamental aspects of a public server on Discord let’s proceed to the steps for creating a public server on a PC.
Step 1: Open the Discord App On Your PC
First, open Discord on your PC. Log in to your Discord account with your credentials.
Step 2: Navigate Your Present Server
From the menus on the upper left hand, you must navigate the present server you have already created.
Step 3: Go To Server Name
From your server, right-click on your server name.
Step 4: Go To Server Settings
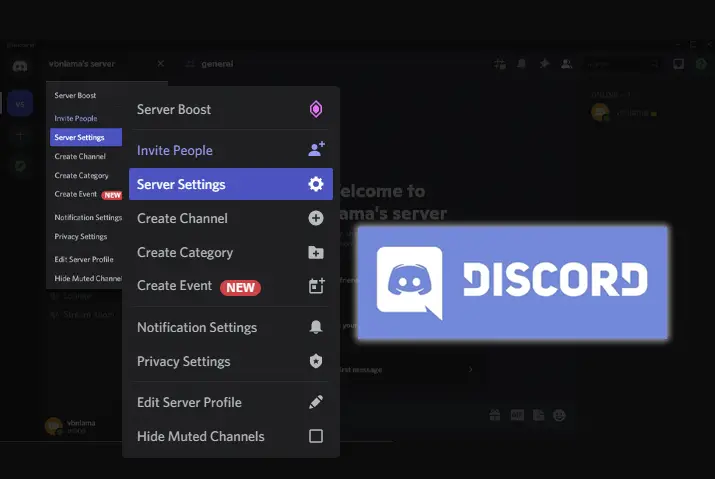
From the drop-down menu that opens up, select Server Settings.
Step 5: Go To Community Settings
Next, select Community Settings to make a public Discord server.
Step 6: Get Started
Next, click on the Get Started button.
Step 7: Complete Server Setup
To start with your server setup to create your private server into a public one, checkmark the verified email address and then scan media content from all members. Then, you can click on the Next button.
Next, you can select server rules or guidelines and community updates. Once you are done with that, click on Next.
Step 8: Set Up Notifications
Finally, set up the notifications for your Public server and finalize the process.
Also Read: How To Delete All Messages On Discord?
How To Make Public Discord Server On Mobile?
If you’re a Discord user on your phone, there’s no need to worry. You can create a public Discover server using mobile applications, too. Regardless of your device, you can follow the steps below to make your Discord server public on your phone.
However, please note that enabling server discovery is not possible on a mobile device; this feature is only available on a PC.
Furthermore, if your Discord server is captivating and interesting to users, the concern about discovery might not be necessary, even when using your phone. Concentrate on generating compelling content, and that should suffice.
Step 1: Open Discord
First, tap on the Discord app on your device to launch it. Log in with your credentials.
Step 2: Go To Server Name
Next, tap on three lines from the upper left corner and then tap on your Server Name from there.
Step 3: Go To Settings
Then, select the Settings Gear icon.
Step 4: Enable Community
You can then tap on the Enable Community option from the community settings in Discord.
Step 5: Get Started
Next, tap on “Get Started”. Then, your server will be converted to a community server first.
Step 6: Set Up Your Server
Click on the available options and go forth with the setup.
You can then set up a rule and community updates for your server and tap on the Next button.
Step 7: Set Up Notifications And Finalize
You can then set up all your notifications and finalize the process to create your public server.
Also Read: Discord Phone Number Already Used
How To Turn A Private Discord Server Into A Public?
To turn your private Discord server public, you must remember the requirements. If all the requirements are fulfilled, you can follow the steps to create a public server, and your process will be complete.
Also Read: How To Archive A Discord Channel?
What Happens When You Make Your Server Public?
If you make your server public in Discord, a few things will happen. First, anyone will be able to join it.
Additionally, any messages sent on the server will be visible to everyone, whether they are members or not. Depending on your server’s purpose, this can be good or bad. If you are running a server for a business, for example, you may want to keep messages private so that customers’ information is not shared with everyone.
However, if you are running a server for friends, making it public can be a great way to keep everyone in touch. Remember that if you make your server public, you cannot remove members who have already joined.
If you want to remove someone from the server, you must ask them to leave. Finally, if you make your server public, it will be listed in the server directory on Discord’s website.
This can be a great way to get more people to join your server, but it also means that anyone who visits Discord can see your server and join it if they wish. Be sure to think about whether making your server public is the right choice for you before you do so.
Also Read: How To Bypass Discord Video Limit?
How To Enable Discovery Of Public Server?
Once you convert the server into a public one, you must activate “Enable Discovery” so your Discord server will be public. From the “Explore Public Server, ” many more users will be able to discover your server and join it. This increases your popularity, which can be a definite plus point.
Look at the above steps until step five to make your Discord server public and apply these steps after to Enable Discovery in Discord.
Step 1: Go To Community Server Settings
First, access Community Server Settings in Discord from the steps mentioned above.
Step 2: Go To Discovery
Go to the Discovery option from the Community section. Your server needs to fulfill all the requirements mentioned above, and only then will you be able to enable discovery. On the discovery page, you can check whatever requirements are not fulfilled and work from there.
Step 3: Enable Discover
Once your requirements are set, click on the Enable Discovery button, and it will be done.
Also Read: How To Send Videos On Discord? (More Than 8MB)
How To Make A Discord Server?
Now that you have learned how to make a Discord server public, this blog section is for those who want to start from the basics. In this section, I’ll guide you through how to make a Discord server.
Making a Discord server is fairly simple. Once you create a Discord server, you can invite people to your server and later change your server to either private or public.
To make a Discord server, what you can do is:
Step 1: Open The Discord App
First, open the Discord app either on your phone or PC and log in to your Discord account by entering the login credentials.
Step 2: Tap On The “+” Icon Or “Add A Server” Option
Then tap on the “+” icon to “Add a server” on the left menu bar of your screen.
Step 3: Tap On The “Create My Own” Option
Then, a new window will pop up. Here, you can choose either to join a server or create your own server. Choose “Create My Own.”
Step 4: Choose The Server Categories
You can specify the server categories or skip this question.
Step 5: Provide Your Server Name
Then, the menu to create your server will open. Here, provide your server’s name.
Step 6: Tap On The “Create” Option
Then tap on the “Create” option, and now your Discord is ready to use.
Thus, you can make your Discord server and directly invite your Discord friends. You can also create a welcome channel to welcome new users recently joining the Discord server via an invitation link.
Also Read: How To Add Bots To Discord Server?
Frequently Asked Questions (FAQs)
Some frequently asked questions on how to make a Discord server public are below.
How Do I Enable Community In Discord?
You need to access your settings and easily enable community in Discord from there.
How To Make A Discord Server Popular?
The most important things you can do to keep your Discord server popular are:
- Invite people
- Make sure there is an activity within the Discord server
- Keep the discord server active and alive.
Conclusion
Making a Discord server public opens it to more users but also requires more moderation. Meet size, security, and age requirements first.
Then, enable community features and discovery listings to expose your server. Monitor participation trends and encourage positive interactions as you shape a constructive culture. A public server connects people across shared interests, but sustaining growth requires diligence. Transition gradually and adjust based on feedback.
Did you find this article helpful? Comment down below to share your experience! I’d like to hear any input you have on this topic.

