Facebook group is one of the popular features that Facebook provides. Through the medium of the Facebook group, you can connect with a huge mass of people across the globe. You can convey messages and information over a large number of followers with a single post through the Facebook group. The Facebook groups are for businesses, brands, entertainment, and groups of co-workers to connect with followers, share stories, and create events.
Many business people use this platform to convey messages to reach their followers. You might also have created a Facebook group for your business or might be a personal page. Over time, you might have felt difficulties in running your group due to some issues. So, you might be searching on how to delete Facebook group.
Reasons to Delete Facebook Business Group Permanently
-
Flagship Problems
Some people in your group might not like what you are sharing on the group. Some business competitors might also get into your group in the form of fake ids. They might steal your business ideas. Similarly, there might be some oppositions who are looking for every opportunity to bring your business down. These people might report your group, and you might get flagship issues forcing you to delete Facebook group.
-
Data Security & Integrity
Some months back, there was some news in the media against Facebook regarding data security and integrity. It was said that Facebook breached some policies and sold the data and information of users to a third party. It created chaos across the world. Keeping this in mind, many top business personnel and organizations might wish to delete Facebook group and remove themselves from the social network completely.
-
Duplicate Groups
Having similar or duplicate groups could be a reason for a person to delete fb group. If you have identical groups but do not have enough time to look after both the groups, then removing one of them is a good idea. You can advertise one of your group and ask your followers of the next group to that one group. In this way, you can merge the groups and attract more followers.
-
No Time to Post Updates
Having a busy schedule is always a headache. You have several tasks to look into. You won’t be able to post updates to your Facebook business group. Making another person an admin of the group could be an option in this case. However, trust issues might come in between while doing so. And finally, you might decide to delete a Facebook business group permanently.
How to Delete Facebook Group Permanently?
Even though the Facebook group is an essential platform for business promotion and other purposes. Difficulties in managing your group come knocking on your door. And you might have to delete the Facebook group due to several reasons that might include reporting problems. Similarly, you might have to delete the Facebook business group permanently due to your group being old and running out of fashion and people trading your group for other new groups.
If you have a Facebook group, but you don’t have time to post any updates, then it is better to delete your Facebook group. While you are unable to post frequent happenings on your group, then the group will be inactive. People will lose interest in your group, and they will start to unfollow your group. Having an inactive group is worthless, so it’s better to delete the Facebook group.
To delete the Facebook business group is quite a lengthy task. It takes so much time and works to remove a Facebook group. Moreover, it is a complex task as it requires repetitive steps.
Delete a Facebook Business Group on PC
Step 1: Login to your Facebook account
Open Facebook and login to your Facebook account.
Step 2: Click on the dropdown icon at the top right of the page.
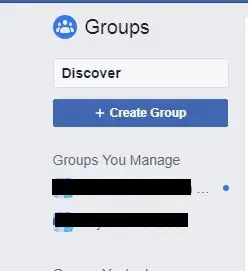
You will see the following options. Select “manage groups.”
![]()
Step 3: Select the group you want to delete.
After you click on manage groups, you will see a list of groups that you have. Now, choose which group you want to delete. For this simply click on that group name.
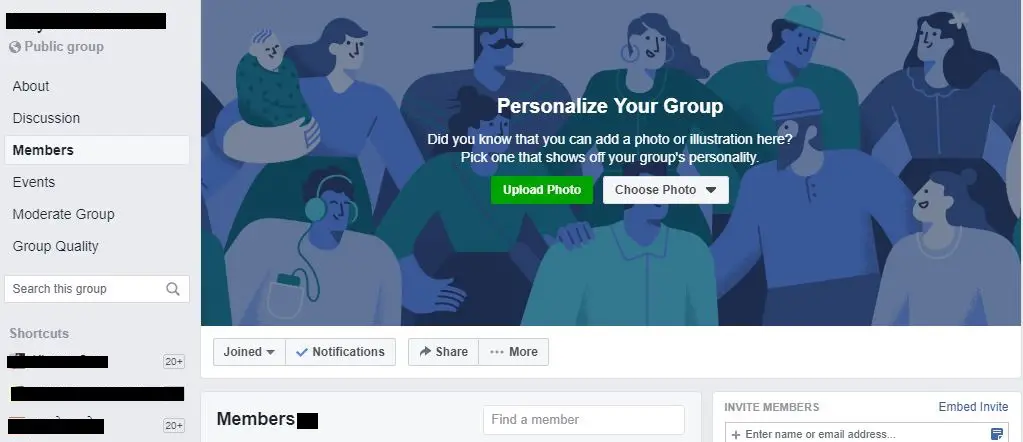
Step 4: Go to “members.”
On the left of your screen, you will see many options. You have to select “members.” Now you will see all the members of your group. If you want to get out of the group, simply click on the three dots ![]()
towards the right of your name on the members’ list and select leave group. But the main concern here is to delete Facebook group. So, now you have to go for a lengthy process. On the members’ list, click on each member’s name and select “remove from the group.” Repeat the same steps with each member of the group.
 Step 5: Select “leave group.”
After you finish removing each member from your group, at last, you will be the only person remaining. Now you have to remove yourself from the group to delete Facebook business group. Click on dots at the right of your name and select “leave the group.”
Conclusion
Congratulations! You’ve removed all members and yourself from the group which means you have successfully deleted the group. Though the Facebook group is really beneficial for business purposes, several problems arise there as well. You might be compelled to delete your Facebook group permanently. Here, I’ve shown you step by step guide to delete the Facebook group on the computer. I hope this turns out to be helpful to you.

