Instagram is a photo and video sharing social media application that allows its user to upload as many photos and videos as they want to share. As people share their personal memories in the form of posts, stories, and more, personal security is the main factor here. So, two-factor authentication is very important for social media applications like Instagram. Now we look into how to turn on two-factor authentication on Instagram.
This will help people to protect their information on an Instagram account. Also, two-factor authentication will enhance the security on Instagram in an easy way. Thus, you can turn on two-factor authentication with various methods.
How Two-Factor Authentication Works On Instagram
Two-factor authentication, only allows you to access your Instagram account on a trusted device or via the web. When you want to log in to your Instagram account on a new device for the first time, you will need your password and the six-digit verification code.
For example, if you have an iPhone and you are logging in to your Instagram account for the first time on your iPad, you’ll be prompted to enter your password and the verification code that’s automatically displayed on your iPhone.
After signing in, you would not be asked for a verification code on that device again unless you sign out completely, erase the device, or need to change your password. Also, when you sign in on your web browser, you are prompted to choose to trust your browser. When you do so, you would not be asked for a verification code the next time you sign in from that PC.
Methods Of Two Factor Authentication
There are several two-factor authentication methods that you can use with your Instagram account. Here are the two methods on how you can do two-factor authentication with your Instagram account.
- Text Message (SMS) On Your Phone
- Login codes from a third-party authentication app (like Duo Mobile or Google Authenticator)
You should set up at least one of the above to use two-factor authentication. After turning on the two-factor authentication, you will be able to receive recovery codes for your Instagram account if you have any problems in receiving a code.
How To Turn On Two Factor Authentication From Your Android Device
Two Factor Authentication is an extra layer of security for your Instagram account. So, here are the steps on how you can enable two-factor authentication features from your Android devices.
Step 1: Launch An Instagram App
Launch your Instagram app from the app menu on your Android device.
Step 2: Go To Your Profile
Tap on your ‘Profile’ picture which is on the bottom right corner of the Instagram Home screen.
Step 3: Go To The ‘Settings’
Tap on the ‘three horizontal’ lines on the top right corner of your ‘Profile’ page and tap on the ‘Settings’ option.
Step 4: Two Factor Authentication
Under the “Settings” menu, tap on the ‘Account’ option and you will see “Two-Factor Authentication”.
Step 5: Get Started
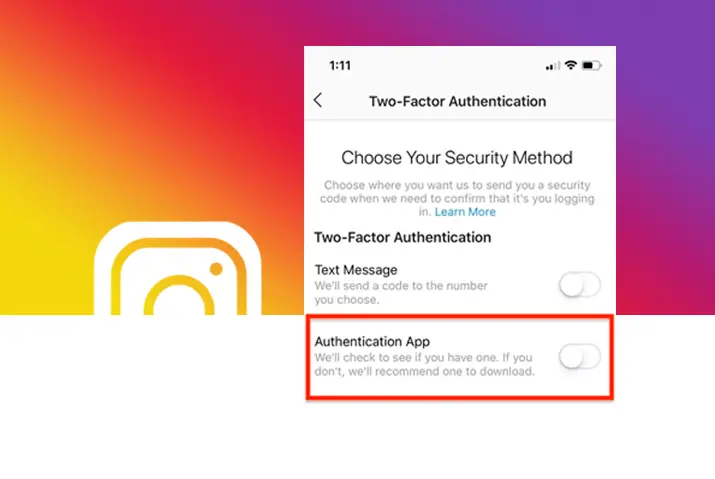
Click on the ‘Get Started’ button and now you will get to choose between two options- ‘Text Message’ or ‘Authentication App’
Step 6: Toggle On The ‘Text Message’ Option
You can toggle on the “Text Message” option to enable the feature. Now the six-digit code sent to your mobile number via text will be entered automatically and tap on the ‘Done’ button. Again, tap on the ‘Done’ button.
Step 7: Recovery Codes
After verifying, Instagram will give you backup recovery codes. These codes can be used when you don’t receive the six-digit code on your mobile or you are unable to access it for some reason during login authentication.
Step 8: Save Recovery Codes
While sending recovery codes, the window indicating the ‘Screenshot’ option will appear. Click on the ‘Screenshot’ option below to automatically screenshot the codes and it will be saved to your gallery.
Also, you can copy and save it somewhere else. These codes can be used just for emergency situations.
How To Turn On Two Factor Authentication From Your iOS Device
You can turn on two-factor authentication from your iOS devices as well. With two-factor authentication, only you have the access to your Instagram account on a trusted device or via the web. So, here are the steps on how you can enable two-factor authentication features from your iOS devices.
Step 1: Launch An Instagram App
Launch your Instagram app from the app menu on your iOS device.
Step 2: Go To Your Profile
Tap on your ‘Profile’ picture which is on the bottom right corner of the Instagram ‘Home’ screen.
Step 3: Go To The Settings
Tap on the ‘three horizontal’ lines on the top right corner of your ‘Profile’ page and tap on the ‘Settings’ options.
Step 4: Two Factor Authentication
Under the “Settings” menu, tap on the ‘Security’ option and you will see “Two-Factor Authentication”. Tap on that option.
Step 5: Get Started
Click on the ‘Get Started’ button and now you will get to choose between two options- ‘Text Message’ or ‘Authentication App’
Step 6: Toggle On The ‘Text Message’ Option
You can toggle on the “Text Message” option to enable the feature. Now enter the six-digit code sent to your mobile number via text and tap on the “Next” button.
Step 7: Toggle On The ‘Authentication App’ Option
Before this, make sure you have already downloaded the free ‘Google Authenticator’ app on your iPhone.
If not, you can click on the ‘Install Now’ button after you click on the back arrow and toggle on the ‘Authentication App’ option in your Android device then tap on the “Next” button. This is an alternative option for authentication.
Step 8: Authenticate The Code
Then select ‘Open’ from the pop-up box and take a note of the six-digit authentication code for Instagram in the ‘Google Authenticator’ app. This code changes every 30 seconds.
Step 9: Enter Six-Digit Code
Now go back to your Instagram app on an iOS device and enter a six-digit code. Then tap on the “Next” button.
Step 10: Backup Codes
Tap on next again and after verifying, Instagram will give you backup codes. These backup codes can be used when you don’t have access to the ‘Google Authenticator app in the future. So, take note of it.
Step 11: Tap ‘Done’
Lastly, choose the ‘Done’ option.
Now the two-factor authentication has been set for your Instagram account on your iOS device.
How To Set Up Google Authenticator?
There are a few steps to set up Google Authenticator on your device. You can proceed with the following steps.
Step 1: Go To Your Google Account
Open any browser and type https://myaccount.google.com/ on your address bar.
Step 2: Navigate To Security
Click on the ‘Security’ option which is on the left-hand side panel.
Step 3: Go To 2-Step Verification
Under the ‘Signing into Google’ panel tap on the ‘2-step verification option’.
Step 4: Sign In To Your Google Account
Click on the ‘Get Started’ button and sign in to your ‘Google’ account with your ‘username’ and ‘password’ and click on the “Next” button.
Step 5: Add More Steps
Under the ‘Add more second steps to verify it’s you’ section, there is ‘Authenticator app’ and tap on ‘Setup’.
Step 6: Select Your Device
There is an option for ‘What kind of phone do you have, you can choose ‘Android’ or ‘iPhone’ and click on the “Next” option
Step 7: Install Google Authenticator
Before scanning the code, first, you need to install ‘Google Authenticator’ on your Android or iPhone.
Step 8: Open Google Authenticator
Open the ‘Google Authenticator’ app on your Android or iPhone device and tap on ‘Get Started’. Now tap on the ‘Scan a QR Code’ option and allow the camera.
Step 9: Scan a QR Code
Now you can scan a QR code from your Android or iPhone device and you will be prompted with a code.
Step 10: Add Account
Tap on the ‘Add Account’ option below the code and on other devices with a QR code click on the “Next” option.
Step 11: Enter A Code
Now enter a code that was prompted on Android or iPhone and click on the “Verify” option. After that tap on the “Finish” option.
How Do I Turn On Two-Factor Authentication On Instagram For Multiple Devices?
After completing two-factor authentication on one of your devices, you just need to copy the code generated. Then paste the code from your first device into the authentication app on each additional device and link your Instagram account into it. If you are looking to secure your account because of safety issues, you can see how to reset your Instagram password for better safety too.
There are three types of authentication code on Instagram: IG Key, one-time code, and recovery code.
What Is IG Key?
IG Key is the one that is generated when you manually set up two-factor authentication on a device and it can be used to set up two-factor authentication across multiple devices.
What Is A One-Time Code?
One-Time Code is a six-digit security code used for verification.
What Is Recovery Code?
Recovery code is the code that you can use as a backup if you can’t access the six-digit code generated by your authentication app.
Frequently Asked Questions
Some frequently asked questions on how to turn on two-factor authentication are below.
How To Turn Off Two-Factor Authentication On Instagram?
You can simply go to your Profile and Settings. Then you can go to ‘Privacy and Security’ and scroll down to ‘Two-Factor Authentication. Open it and toggle the authentication off.
How To Recover An Instagram Account Without Email, Password, And Phone Number?
If you could not access your Instagram account or the email or phone number you signed up with, open the Instagram app on your mobile device and enter your last known email address or phone number. Tap ‘Forgot password?’ and tap on ‘Need more help?’. Now follow the on-screen instructions to submit a support request.
Conclusion
Thus, two-factor authentication is very easy and useful for the security of your Instagram account. And it works for multiple devices so that you can use your Instagram account on all of your devices at the same time. Even if you have lost your device, no one can access your Instagram account without the code to log in.


