The nametag on Instagram is similar to a QR code scanner, Facebook Messenger code, and Snapchat Snapcode. Nametag helps you to add your friends quickly by scanning the nametag of your friend. You can see their account without typing their name in the search box and scrolling down to find their specific account. You can just place the nametag of your friend in a name tag scanner, easily and quickly to find their account. But first, you have to Customize Your Nametag on Instagram if you want to share your nametag.
There are few steps to access the name tag from where you can Customize Your Nametag. Go to menu> Click on the Nametag now to customize your name tag follow the following steps mention below. This helps your friend to search your account easily and quickly.
Customize Your Nametag on Instagram?
You can customize your nametag only in the Instagram App, but you can’t edit or customize your nametag from a web browser. To personalize your name tag from Instagram App, follow the following steps below;
- Open your Instagram Application on your Smart Phone.
- Log in to your Instagram account.
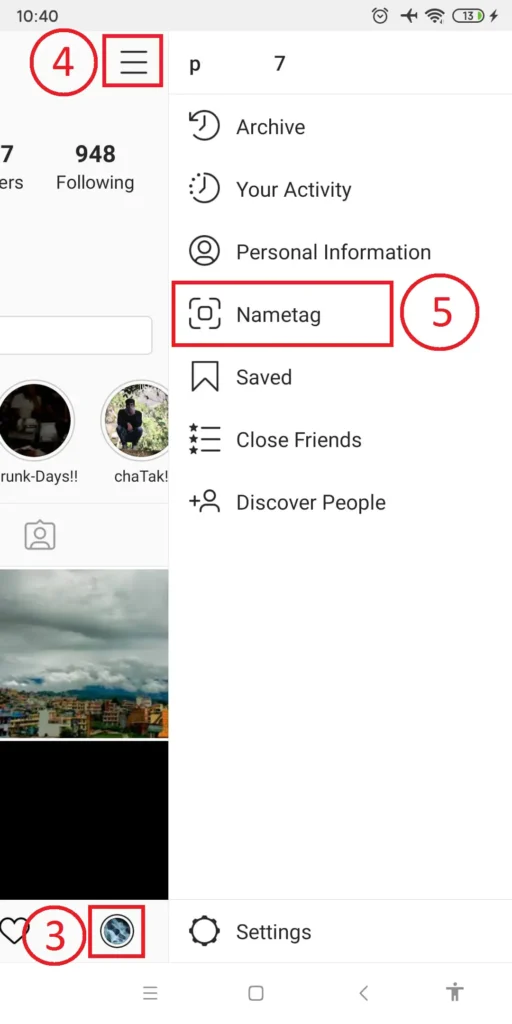
- After you land to the Home of your account, click on the profile icon.
- Now, click on the three-vertical line (MENU), or you can also swipe left.
- After that, you will see a list of options. Now, click on the Nametag just below Archive.
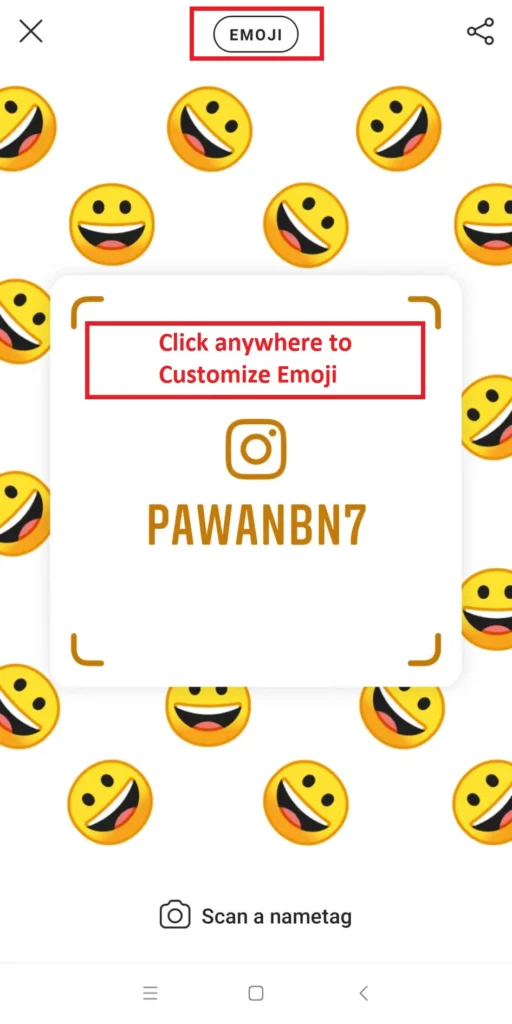
- Now you will see your Nametag you can perform the task to customize your Nametag: but you can only choose one of the options among followings;
- Tap anywhere on the screen to select Emoji. After that, pick Emoji you want to display with your Nametag.
- Now click on the Emoji, which will open an Instagram camera now take a selfie.
To edit the selfie, tap anywhere on the screen, which will change your selfie clip-art. Now your customized background with your selfie will appear with your Nametag. If the selfie you took is not right, then you can retake the selfie by clicking on the Retake, which is just right to SELFIE and closer to the share button.

- Now click on the SELFIE; this will change to color. To choose color tap anywhere on the screen, which will change the color of your background.
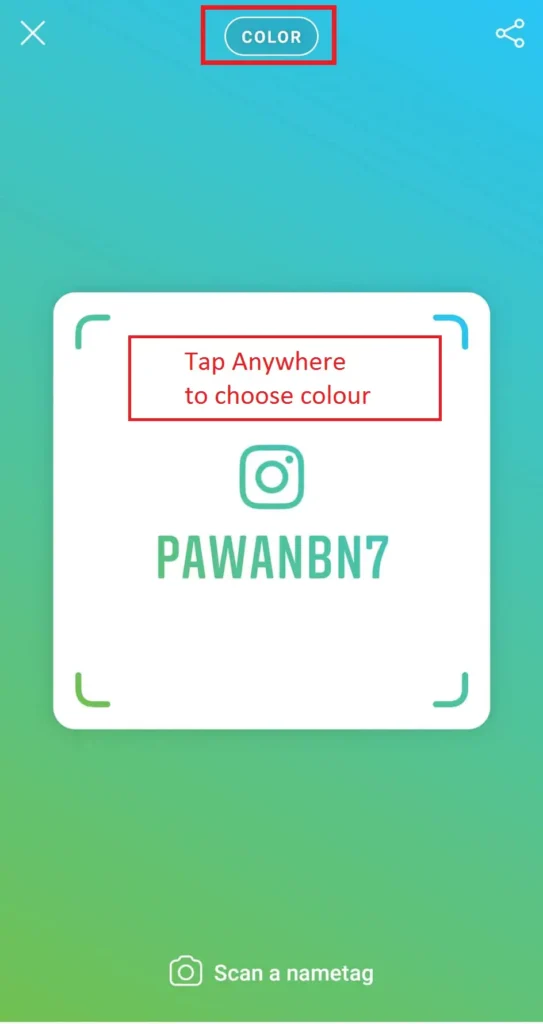
Here, it will automatically save your changes, and now your Nametag is customized. Now to share your Nametag follow the steps under the heading below.
How to Share My Nametag?
If you want your friend to add you on Instagram by scanning your nametag, then you can share your name tag directly to their profile, or if you wish, anyone who is your friend in other applications, then you can share it as a story. How?– follow the following steps mention below;
- Click on the profile icon.
- After that, click on the three-vertical line (MENU), or you can also swipe left.
- You will see a list of options. Now, click on the Nametag just below Archive.
- Now you will see Name tag in the center, with a beautiful background. Click on the Share icon, which is on the top right corner of your mobile screen.
- Now choose the app where you want to share your Nametag.
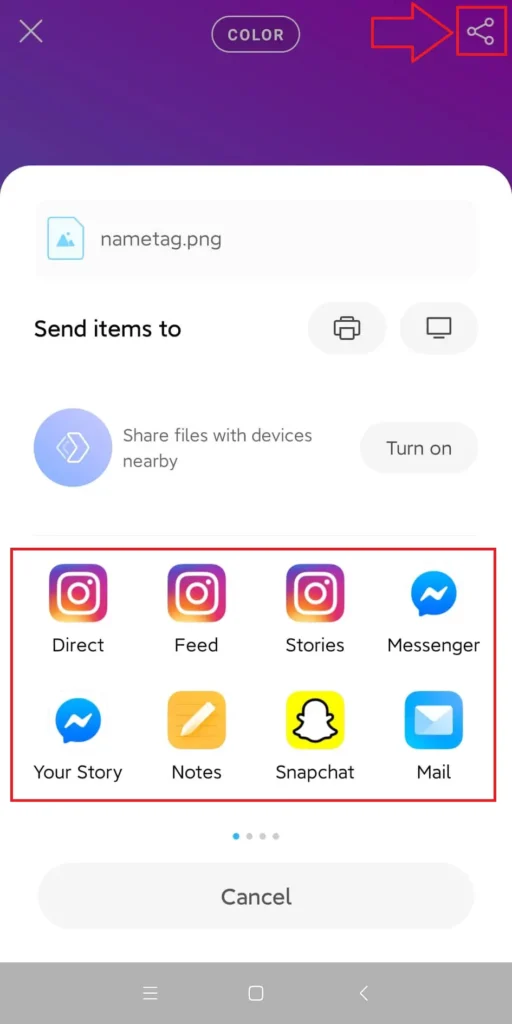
- According to the app you want to share, setting varies. But almost similar steps.
- After you choose an app, click people to share direct or share as your story.
- Finally, post it.
You have successfully shared your Nametag with your friends.
How Do I Scan a Nametag?
If you want to follow your friend by using a nametag, then make sure you have their nametag. Further, I will guide you how you can scan your friend nametag;
- Open Instagram App in your Smart Phone.
- Click on the profile icon, which is in the bottom-right of your mobile screen.
- Click on the three-vertical line (MENU), or you can also swipe left.
- Now, click on the Nametag from the list. After that, it will open a Nametag on your screen. Now you will see a camera icon written Scan a nametag in the bottom middle on the same screen.
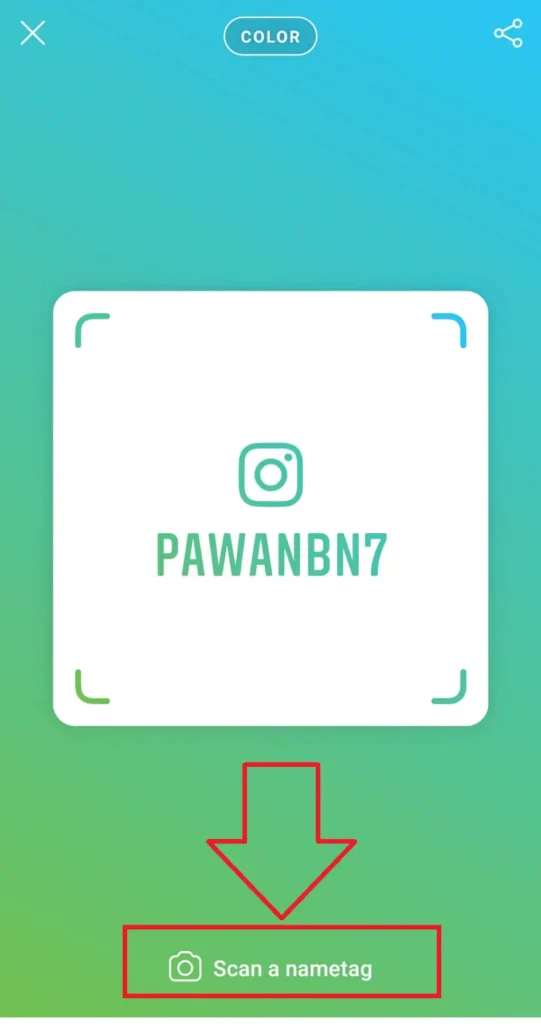
- Click on the camera icon.
- Now make sure you have Nametag of your friend whose nametag you are going to scan.
- Finally, hover the camera angle over nametag until it finds your friend profile.
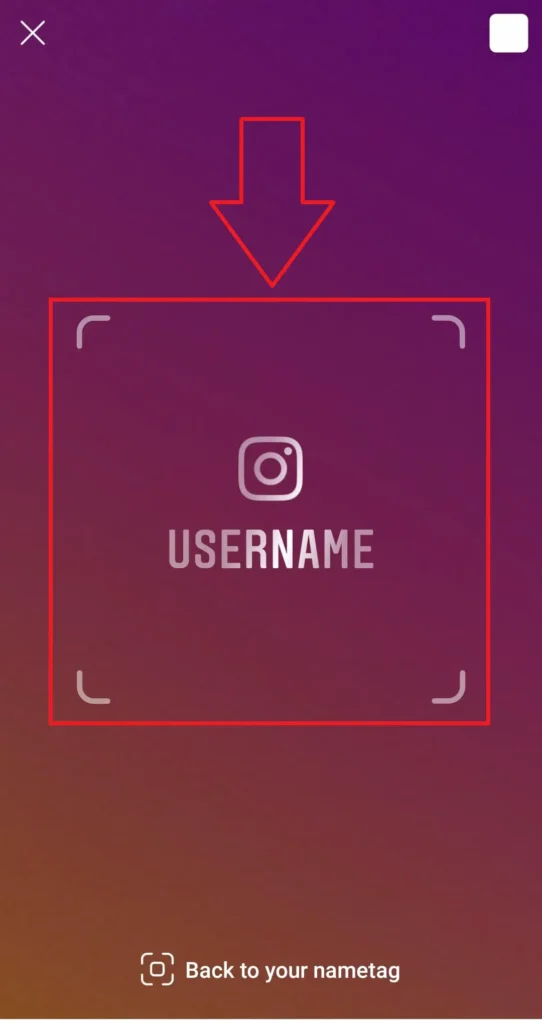
Now, you can see the profile of your friend appeared on your screen after the scanner scans your friend nametag.
Conclusion:
Now you can add any of your friends using Instagram scanner scanning their nametag and you can also customize Your Nametag and share among your friends to search your account. If you have any questions regarding this article then you can leave us a comment in the comment section. You can also visit our official website Online Help Guide for a related article on Instagram.
Thank You.

